
-
Website
-
3min Explainer Walkthrough

- Generate a Design
-
Page Management

-
Page Editing

-
Form Builder

- Updating Your Navigation Menu
- Creating Page Redirectors
- Posts Management
-
Search Engine Optimization

- Setting Up Google Marketing Tools
- Setting Up Meta Pixel & E-commerce Tracking
- Setting Up Microsoft Marketing Tools
- Setting Up Linkedin Insight Tag
- Optimizing Images For Web
-
Analytics

- Third Party Embed Code
-
3min Explainer Walkthrough
- Contacts
- Marketing
- Commerce
- Apps
-
Settings and Config
- Going Live
- Updating Your Billing Details
- Changing Your Oncord Plan
- Domain Health Checker
- Managing Administrators
- Registering a Domain Name
- Changing Your Domain Name
- Backing Up Your Website
- Choosing an E-mail Host
- Hosting Email With Oncord
- Setting Up Gmail Hosting
- Setting Up Office 365 Hosting
- Setting Up Sub Domains
- Hosting a Sub-Site
Setup the QuickBooks Online Integration
In order to use the full featureset of the QuickBooks integration, Oncord's Commerce and Marketing features are required.
An easy way to determine whether you have those features installed, is to look for the "Commerce" and "Marketing" links located in the sidebar of your Oncord Dashboard.
Changing your Oncord plan is easy - click here to review the instructions.
To make the below setup steps easier, we also recommend logging in to your QuickBooks Online account before enabling the integration.
If you don't already have a QuickBooks Online account, you can sign up for one on the Intuit website: https://quickbooks.intuit.com/
What Data is Synchronised?
The QuickBooks integration works by synchronising the following data:
| From Oncord | From QuickBooks Online |
Contacts
|
Contacts
|
Sales
|
Invoices
|
Receipts
|
Payments
|
When Does it Sync?
You can choose to enable or disable automatic synchronisation within the QuickBooks App integration page (Go to Settings > Third Party Integrations > "Configuration" link under the QuickBooks App).
Oncord will batch-sync with QuickBooks two minutes after an update takes place within Oncord.
For instance, if you updated a contact's e-mail address at 2:00pm, and then an invoice is created at 2:03pm. Both changes would be reflected at 2:04pm within QuickBooks.
If no updates take place within Oncord, a scheduled sync will take place after 12 hours to download data from QuickBooks.
Enable the QuickBooks Online Integration
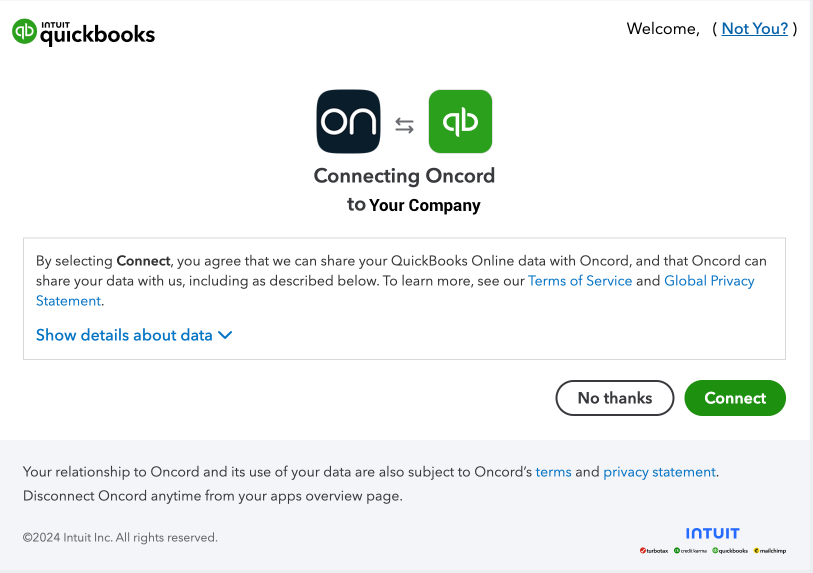
After clicking the "Connect to QuickBooks" button, you will be redirected to QuickBooks and presented with the below page which will allow you to give Oncord API access to QuickBooks.
Select the company you would like to synchronise with and click the "Next" button. You will be redirected back to Oncord QuickBooks integration configuration page.
Configuration
You will be presented with configuration options the first time you manually synchronise QuickBooks and Oncord. Check the options carefully and configure the integration appropriately.
Important: Map Deposit Accounts for Payment Methods:
Synchronisation also occurs between "Payments" in QuickBooks, to "Receipts" in Oncord. This area defines the mapping between the two
systems.
- For direct deposit accounts, you should select the bank account that customers pay into.
- For credit card payments, it is recommended you use 'Undeposited Funds'. Refer to this article: https://quickbooks.intuit.com/learn-support/articles/getting-the-most-out-of-quickbooks/using-undeposited-funds-in-quickbooks-online/05/920745
- Cash and other manual payment methods may also use 'Undeposited Funds'.
- It is recommended that all payment methods are linked to a QuickBooks deposit account.
Configure Income Accounts
For improved reporting in your Profit and Loss statements, it's common to separate revenue into different income accounts.
Oncord synchronises Sales items with Products in Quickbooks. Each Product or Category can be linked to a Quickbooks Product which can represent a type of revenue.
- In Quickbooks, create Products for each Revenue type
- In Oncord, edit each Product Category or Product and link them to the QB Products
.png)
When choosing which product to link to, Oncord will check the Product configuration, its direct Product Categories, any parent Categories, then finally it will use the default configuration defined in the Settings > Apps > Quickbooks configuration.
Synchronise a Test Invoice
Create a test invoice under Commerce > Sales > New Sale.
Open it and on the top right, you can see three dots next to the QB icon.
Click "Sync with QuickBooks Online".
The icon will turn from gray to green once it has synchronised.
Click the icon to open it in QuickBooks Online to check it.

Repeat the process of synchronising various individual invoices to ensure that the data will flow into Quickbooks Online correctly.
Bulk Synchronise
To perform the first manual synchronisation, click the "Synchronise" button in the QuickBooks Online box displayed on the
Settings > Integrations page.

If you'd like to configure the integration again, click the "Configuration" link for QuickBooks on the Integrations.
Once you are satisfied with your configuration you can enable Auto-Sync:
.png)
Reconnecting QuickBooks
If you’d like to re-connect Oncord and your QuickBooks account, you can reconnect by going to Oncord Third Party Integrations page and click
the "Configuration" button in the QuickBooks Online box. You will be presented with the below screen.
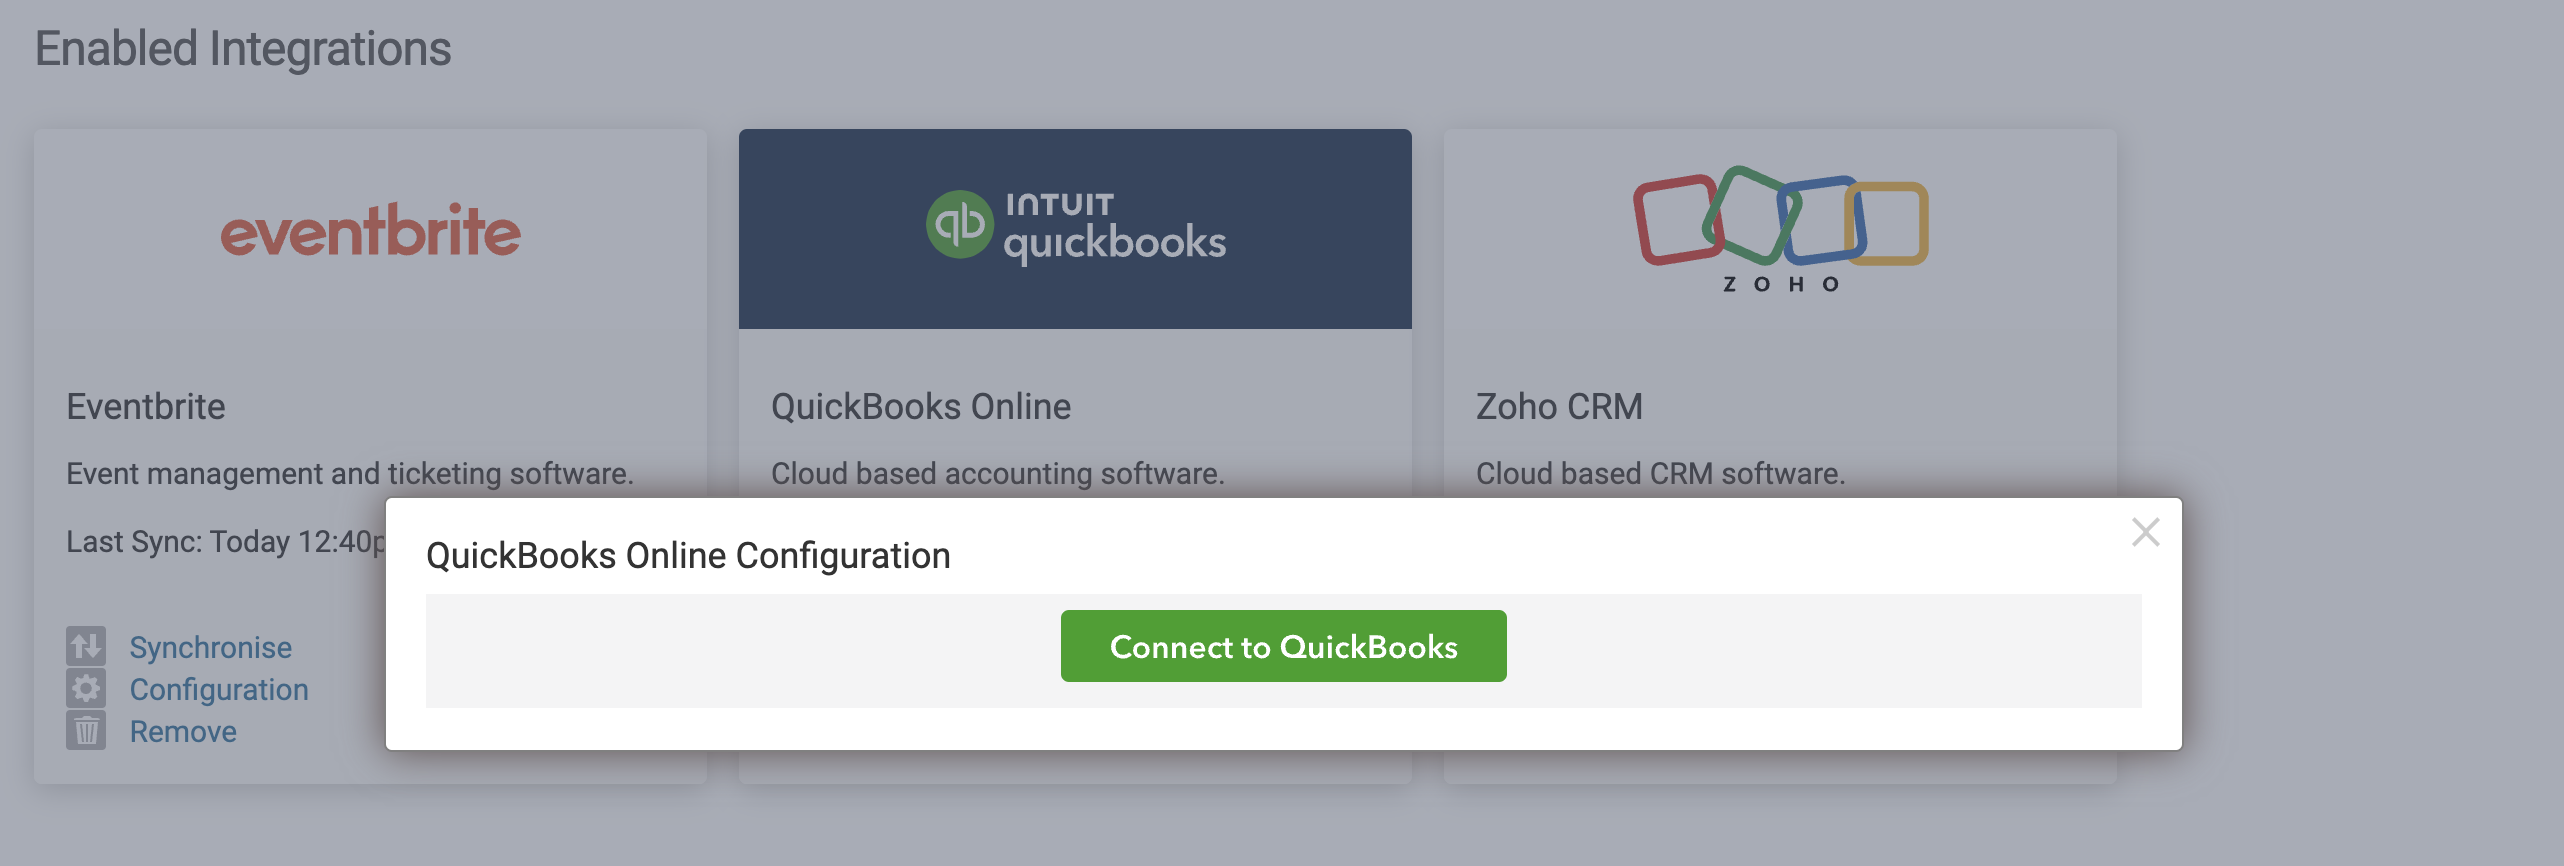
You will usually reconnect to QuickBooks if the connected account has been deauthorized to access your QuickBooks Online company and
you need to authenticate a new account to maintain the connection between Oncord and QuickBooks.