
-
Website
-
3min Explainer Walkthrough

- Generate a Design
-
Page Management

-
Page Editing

-
Form Builder

- Updating Your Navigation Menu
- Creating Page Redirectors
- Posts Management
-
Search Engine Optimization

- Setting Up Google Marketing Tools
- Setting Up Meta Pixel & E-commerce Tracking
- Setting Up Microsoft Marketing Tools
- Setting Up Linkedin Insight Tag
- Optimizing Images For Web
-
Analytics

- Third Party Embed Code
-
3min Explainer Walkthrough
- Contacts
- Marketing
- Commerce
- Apps
-
Settings and Config
- Going Live
- Updating Your Billing Details
- Changing Your Oncord Plan
- Domain Health Checker
- Managing Administrators
- Registering a Domain Name
- Changing Your Domain Name
- Backing Up Your Website
- Choosing an E-mail Host
- Hosting Email With Oncord
- Setting Up Gmail Hosting
- Setting Up Office 365 Hosting
- Setting Up Sub Domains
- Hosting a Sub-Site
Importing Contacts
Importing your contacts into Oncord is an easy process.
You can import contacts from an Excel spreadsheet or “CSV file”. Most CRM systems, e-mail marketing platforms, and accounting software will allow you to export your contacts as a CSV file, which you can then import into Oncord.
The Process
1) Examine and Clean the Data to Import
As a first step, open your spreadsheet to view the contact data. We recommend using Microsoft Excel to edit CSV files, however you may use Google Sheets as an alternative.
You will see all of your contacts listed. An important step is to examine your data to ensure that fields / columns are setup correctly.
Each field should be separated into different columns. For instance, first and last names should appear in separate columns. For addresses, there should be separate fields for the address line, the suburb or town, the postcode, and the country.
If any fields are merged together, you can use the “Text to Columns” feature of Excel which allows you to split columns by spaces in the
data.

Within Excel, the Text to Columns tool can be used to split up columns
2) Marketing Subscription Status and Consent
When importing, the system will by default subscribe new contacts to receive e-mail and sms marketing messages. If you do not want this or do not have consent to send to those contacts, create a column in your CSV file called “Email marketing status”. In this column, you can specify three subscription options: ‘pending’, ‘subscribed’ or ‘unsubscribed’.

If you are unsure about whether you have consent to send marketing campaigns, please consult your local spam act or seek legal advice.
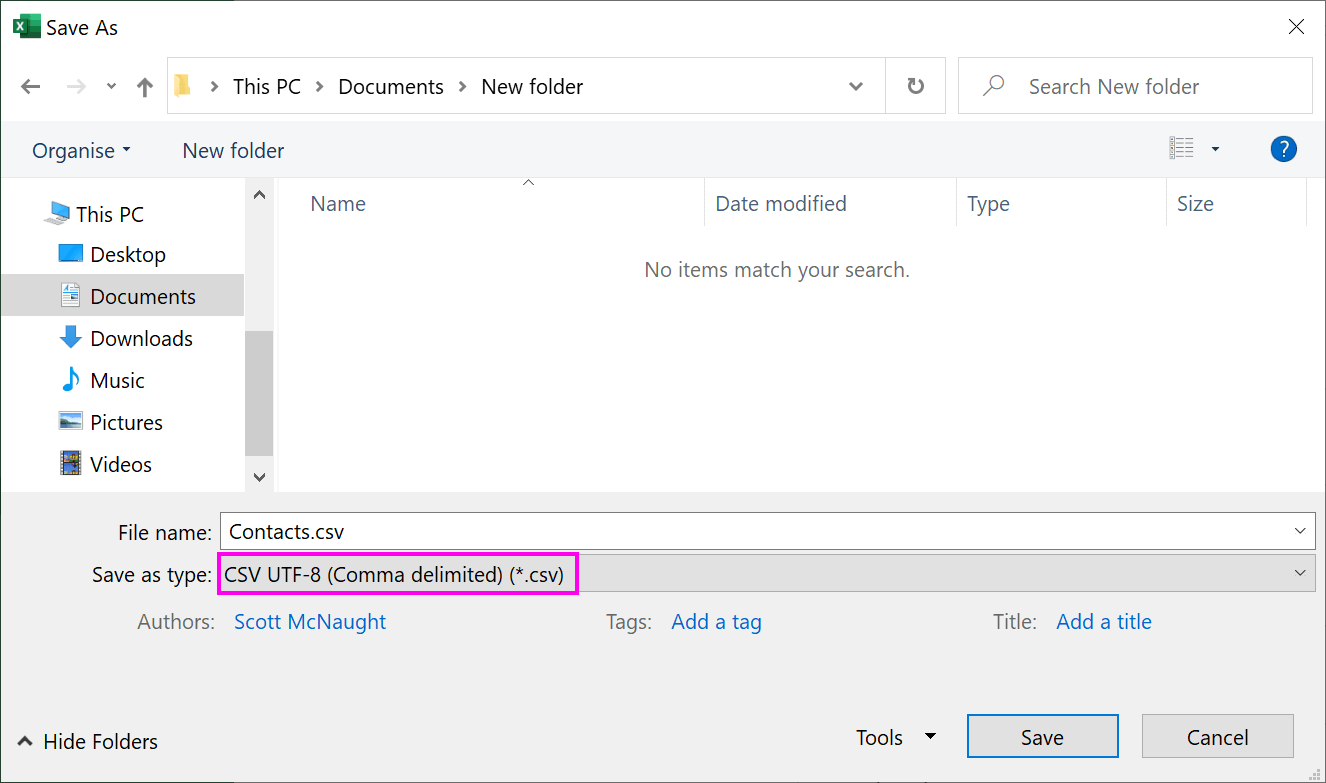
3) Save as a CSV File
When you have finished examining and updated the spreadsheet, save the CSV file. In Excel, you may need to do this by going File -> Save as and choose the CSV UTF-8 (Comma delimited) option.
4) Import Into Oncord
Now that you have prepared your data, its time to import!
It is recommended that for any import, you should create a new group to import these contacts into. To create a new group, login to
Oncord, and select the Groups link in the left sidebar.
When you are ready to import your contacts, select the “Contacts” link in the left sidebar, and click the “Import” button at the top of the
screen.
Choose the recently saved file from your computer and press Next configure the import.
Specify whether your spreadsheet has a “heading row” (the first row in your spreadsheet defines the labels of each of the columns).
You are then given options to map the columns in your spreadsheet to contact fields in Oncord. The system will try to automatically map
these for you; however you must check and fix them to ensure they are correct.
In the additional settings tab, you can control if the emails are to be validated during import, to ignore or import contacts without emails
addresses, and whether to override contacts that already exist in the database.
You will likely also want to add the contacts to a group.
Once you have configured the import, the system will show you a preview of how it is going to import the data.
Click on the link up the top to see which contacts will be imported, merged, and skipped.
After importing contacts, you can take advantage of Oncord’s powerful marketing and management tools.
It’s a quick, simple process and you will be ready to go in no time!