-
Website
-
3min Explainer Walkthrough
- Generate a Design
-
Page Management
-
Page Editing
-
Form Builder
- Updating Your Navigation Menu
- Creating Page Redirectors
- Posts Management
-
Search Engine Optimization
- Setting Up Google Marketing Tools
- Setting Up Meta Pixel & E-commerce Tracking
- Setting Up Microsoft Marketing Tools
- Setting Up Linkedin Insight Tag
- Optimizing Images For Web
-
Analytics
- Third Party Embed Code
-
3min Explainer Walkthrough
- Contacts
-
Marketing
-
Email Marketing
-
Automation
- SMS Marketing
-
Events Management
- Connecting Social Media
- Complying With Spam Laws (Australia)
- Changing Your Sender E-mail Address
- Change Links After Email Sent
-
Email Marketing
- Commerce
- Apps
-
Settings and Config
- Going Live
- Billing
- Domain Health Checker
- Managing Administrators
- Registering a Domain Name
- Changing Your Domain Name
- The Role of DNS Records Explained
- Backing Up Your Website
- Choosing an E-mail Host
- Hosting Email With Oncord
- Setting Up Gmail Hosting
- Setting Up Microsoft 365 E-mail Hosting
- Setting Up Sub Domains
- Hosting a Sub-Site
Creating Events
Once the Events Management App is enabled, you can begin creating and managing events directly within Oncord.
- From your Dashboard, navigate to Marketing > Events.
- Select the New Event button to create a new event.
- Complete the configuration form with your event details.
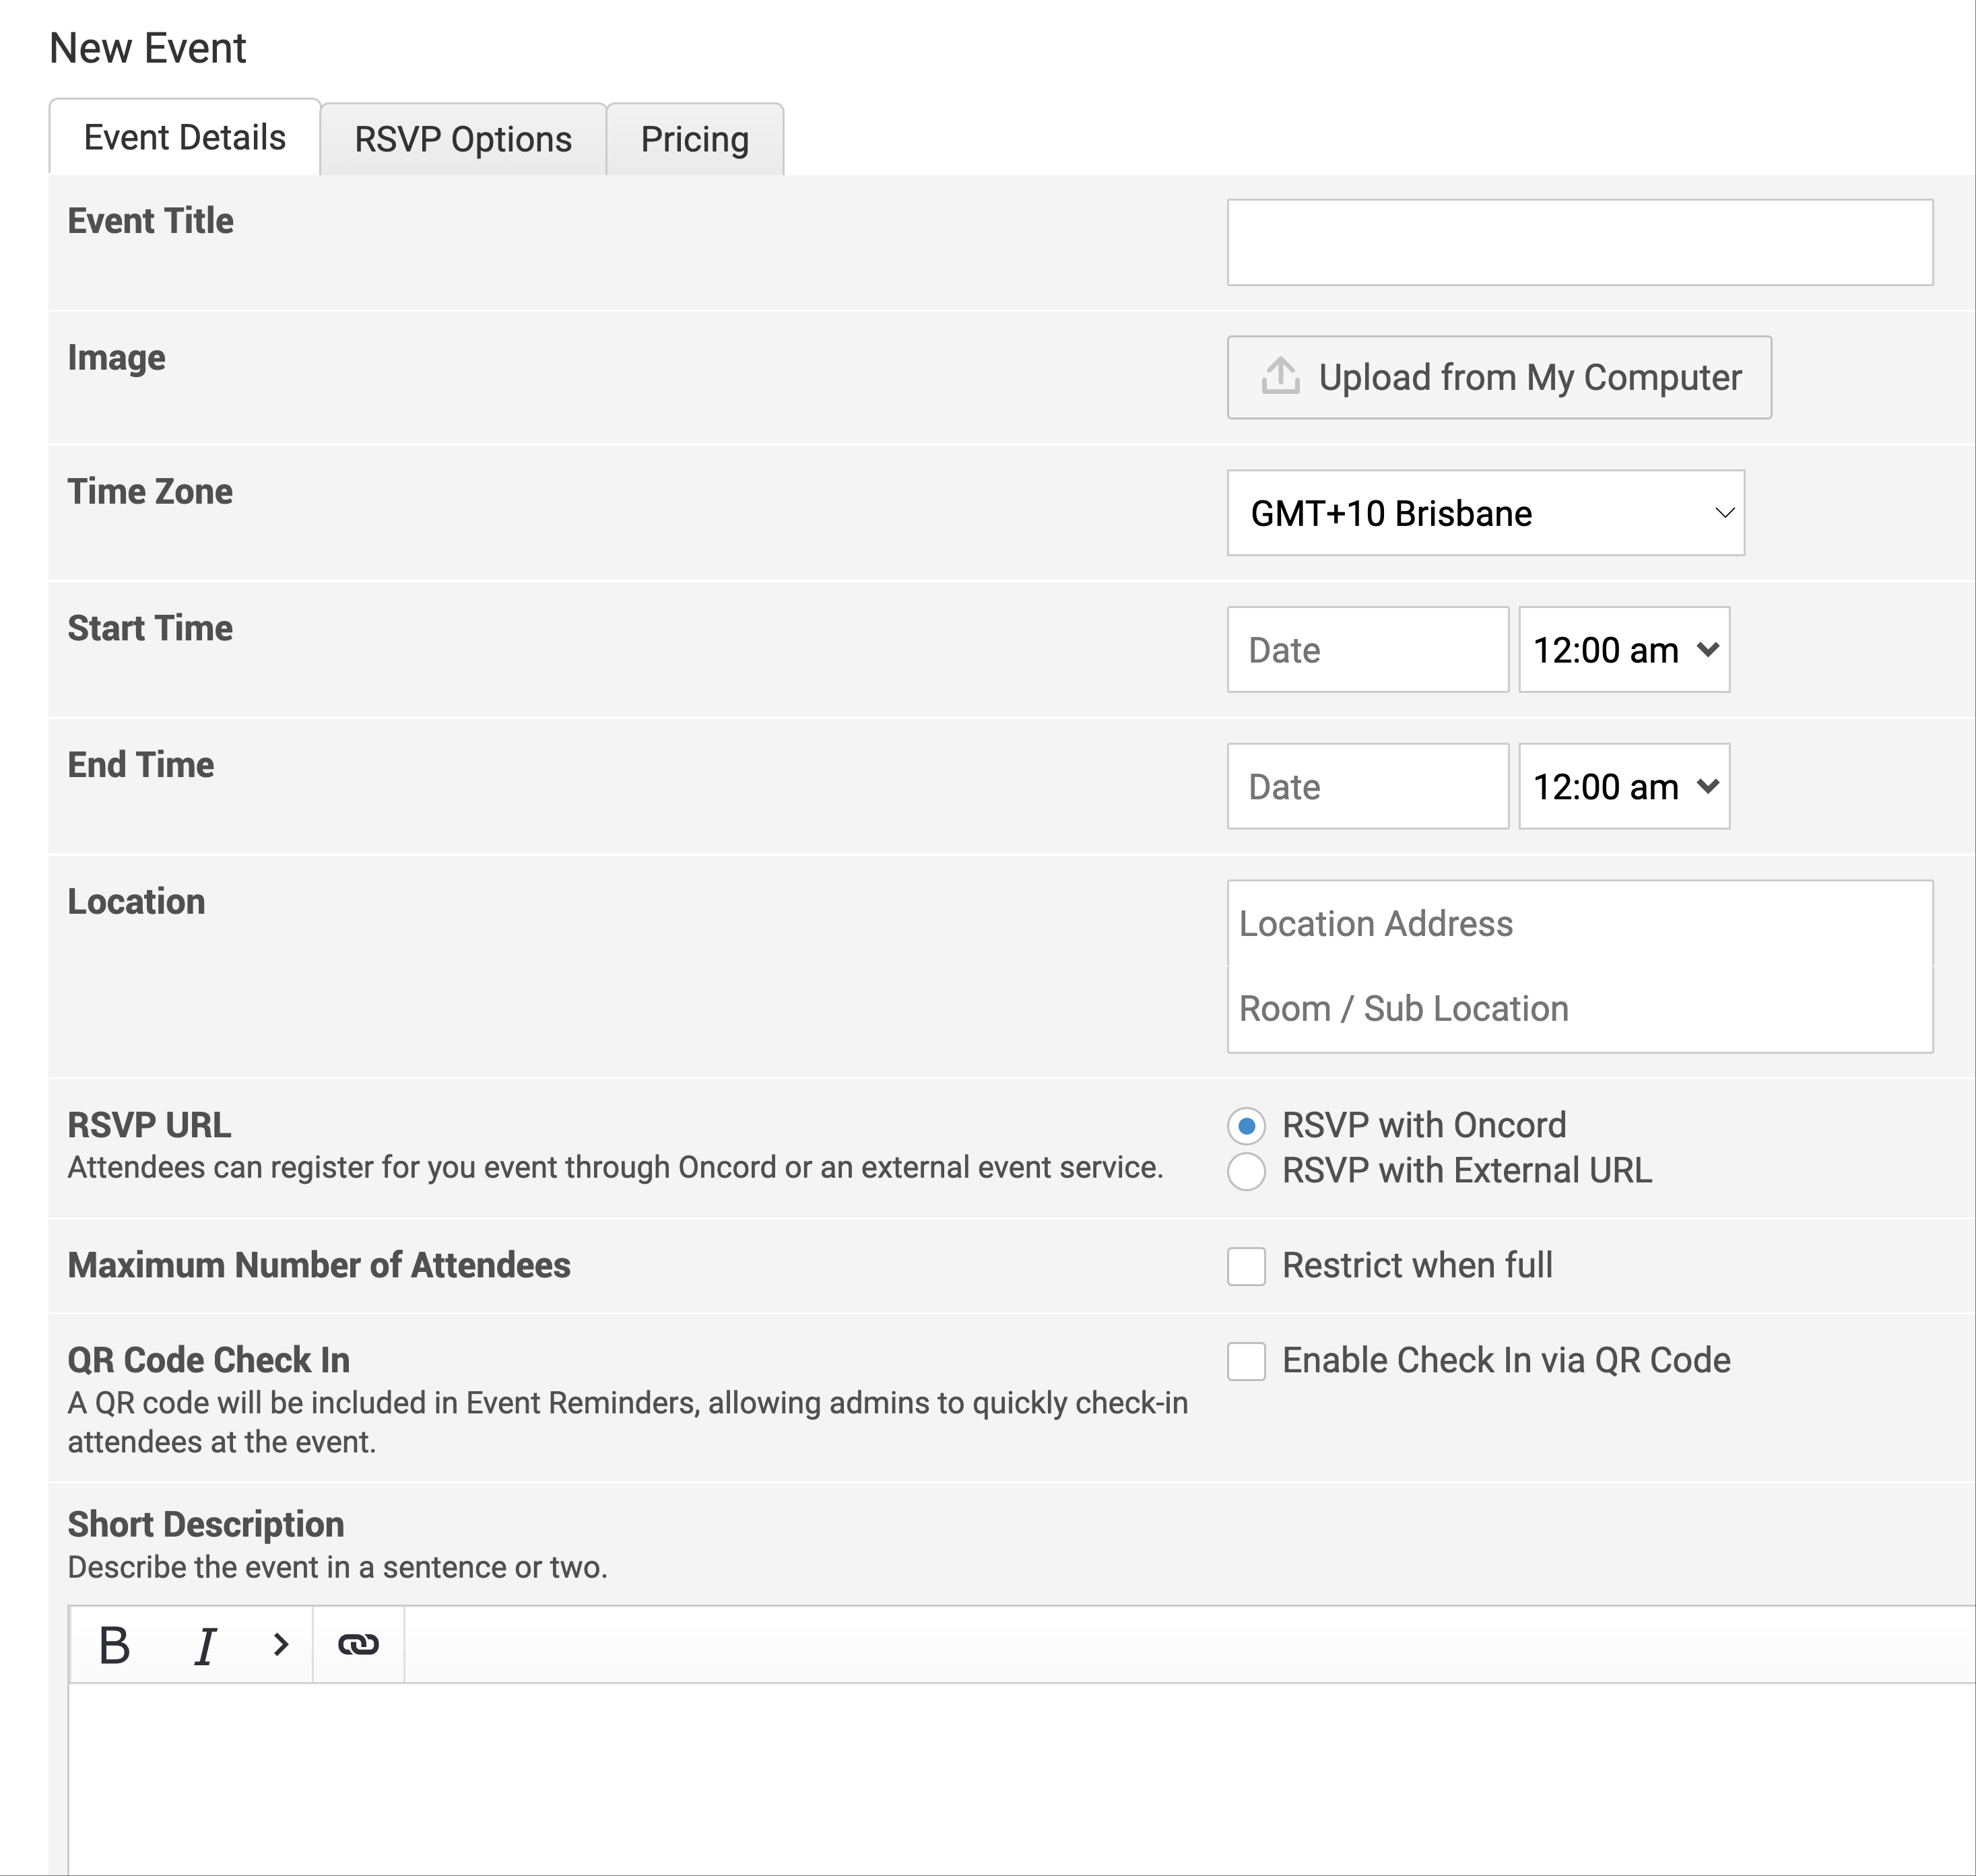
You will be presented with a configuration form. The minimum required information for a new event is a title, start time and end time. Set a sensible event title, as this will be displayed publicly when your users RSVP.
New Event - Basic Options
Event Title: Displayed as a heading on the RSVP page, and when an attendee adds the event to their Google or Outlook Calendar.
Image: Upload an icon for this event. It will be displayed as the event cover image in the event repeater.
Timezone: Confirm the timezone that the start / end times are being specified in.
Start Time: The time when the event will start. Users may still RSVP for an event after the start time, so if you'd like to prevent this from happening you need to ensure that you set the RSVP deadline (in the RSVP Options tab). Both the start and end time will be displayed on the RSVP page.
End Time: The when the event will end. Users cannot RSVP for an event after the event end time.
Location: The location is displayed after the user has RSVP'd, and also when an attendee adds the event to their Google or Outlook Calendar.
RSVP URL: Specify whether attendees will register for this event through your Oncord website, or be directed elsewhere. This setting allows you to display all of your upcoming events on your website, regardless of whether you are managing RSVP within Oncord. When handling RSVP for an event externally, the event description and public RSVP is unavailable, because users are directed to the external URL instead.
Maximum number of Attendees: Select this option to restrict the number of attendees allowed at the event.
QR Code Check In: When this option is selected for an event, a QR code can be included in the event reminders sent to attendees, which allows admins to quickly check-in attendees at the event.
Short Description: This short description acts as a teaser, and may optionally be displayed where events are listed throughout the website.
Description: This description is displayed on the public RSVP page, above the RSVP form.

New Event - Additional RSVP Options
RSVP Deadline: Contacts will not be able to RSVP after this time (you may still manually RSVP attendees though). Ensure
that the "Timezone" field has been set correctly, as the RSVP deadline will also use that timezone.
Invitation Required:
You may opt for this event to be "Open", or "Invite only". Public users will be unable to RSVP or view the details of
an invite only event until they login, and as long as they have been invited to the event. You can send an e-mail marketing campaign with
an RSVP link to attendees, they will be logged in after clicking a link in the e-mail campaign.
Allow Alternate RSVP: This option will allow contacts to specify someone to attend in their place when they RSVP. This option is mostly applicable to invite only events, allowing attendees to send another person in their place instead of the user who was invited.
Allow Guests: Select this option to allow attendees to bring guests, you may specify the maximum number of guests allowed.
Allow Anonymous Guest: All guest fields are optional when this setting is enabled. If the fields are left blank, the guest is treated as anonymous. If the name fields are filled, the guest can still be registered as a new contact.
Registration Fields: Custom fields may be used to include more custom options in the RSVP form, such as dietary
requirements.

